
知識庫
First, you will need a SetraHost hosting account. Once you choose the hosting plan that best suits your needs and you are completely signed up, you will receive an email with your login information to the client area and cPanel control panel. You can install WordPress from either cPanel directly or your client area.
Installing WordPress from cPanel
- Login to cPanel by going to yourwebsite.com/cpanel or accessing cPanel through your MySetra Customer Portal by clicking "Login to cPanel" next to your product.
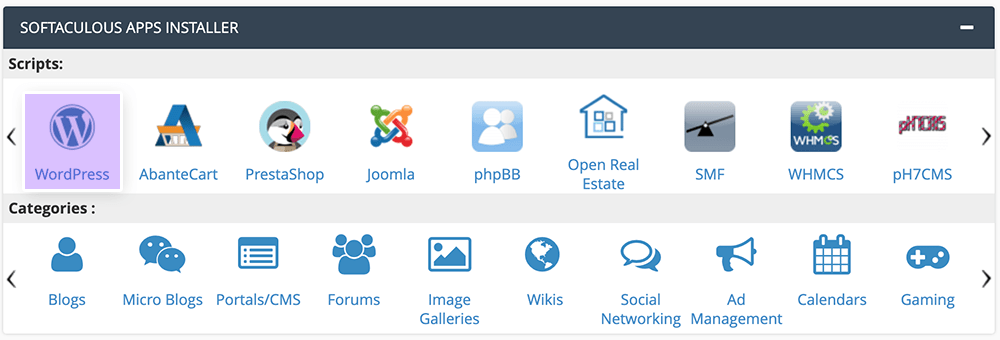
- Scroll down to the bottom to the bottom of your cPanel control panel until you see "Softaculous App Installer and then click "WordPress" under Scripts.
- Here you will click "Install" and follow the prompts and fill out requested information.

- On this page, do not touch the version to install as it will automatically install the latest version of WordPress insuring your website the best and most secure experience with WordPress. To install WordPress on your main public_html folder, next to the category "Choose Installation URL" remove the "wp" under directory. If you'd like it to be in a certain folder and/or be accessed via a subdomain (folder.yourdomain.com), change the "wp" to the folder you prefer. You can click "Quick Install" to remove a few steps allowing you to instantly be able to click "Install" making this process even simpler! If you do choose this option, remember to create your admin login information. Everything else can be edited in your admin panel at anytime.

- Fill out your website name and description, admin login information details and select the plugins you'd like.
- The "Advanced Options" section does not need to be touched (unless you'd like a specific database name and login information). Skip this section and go to the "Select Theme" section
- Choose your theme You can always select and customize a theme after the installation is finished so this can be left unselected.
- Click Install
- You will then receive the URL and login details to your newly installed WordPress website. You're all set to go login and get your WordPress website out to the world!
Installing WordPress through MySetra customer portal
- Login to your MySetra Customer Portal
- Click your product or click the button that says "View Details" next to your product
- Click "WordPress Manager" and then follow the above steps from 3 and on
- wordpress, installation, install, instructions, cpanel, control, panel, softaculous, installer
- 2 Users Found This Useful
相關文章
Powered by WHMCompleteSolution
